This is part 2 of our 3-part series on pasteurization to help our customers use the Craft Metrics Pasteurization Computer.. Make sure to read Part 1: The Science of Pasteurizing.
In this post we'll go over what you need to know to safely and effectively pasteurize cider, beer, or wine at a craft production scale.
Bath pasteurizers
There are many processes for pasteurizing beverages, including inline systems, steam systems, and water bath systems. For the craft beverage producer, a water bath pasteurizer is generally the most practical and economical solution.
At the smallest scale, a stovetop pot of water can serve as a bath pasteurizer, and indeed this is commonly used for homemade canned foods. A pot of water may also work for your pilot batches, but for a larger batch you’ll want a water-filled container large enough for at least 100 bottles at a time, plus a way to keep that water heated to the desired temperature.
In part 3 of this series we’ll get into building or buying a bath pasteurizer. For now, let’s assume you’ve got one.
Safety
If you are pasteurizing a carbonated beverage, the heat from pasteurization will persuade the gas to come out of liquid solution, and can cause tremendous pressure in the bottle. The occasional bottle will burst as a result, so always wear a protective face guard.
Even if your product is not carbonated, be aware that glass bottles can still break due to temperature shock and manufacturing defects.
The basic process
- Bring the water to the desired initial temperature. When you put cold bottles into the hot water, the temperature will decrease dramatically, so it’s best to start with the water on the higher end of your desired pasteurization temperature range. Let’s say 65°C.
- Place the bottles in the water. This is most easily done with plastic milk crates, or a similar type of cage.
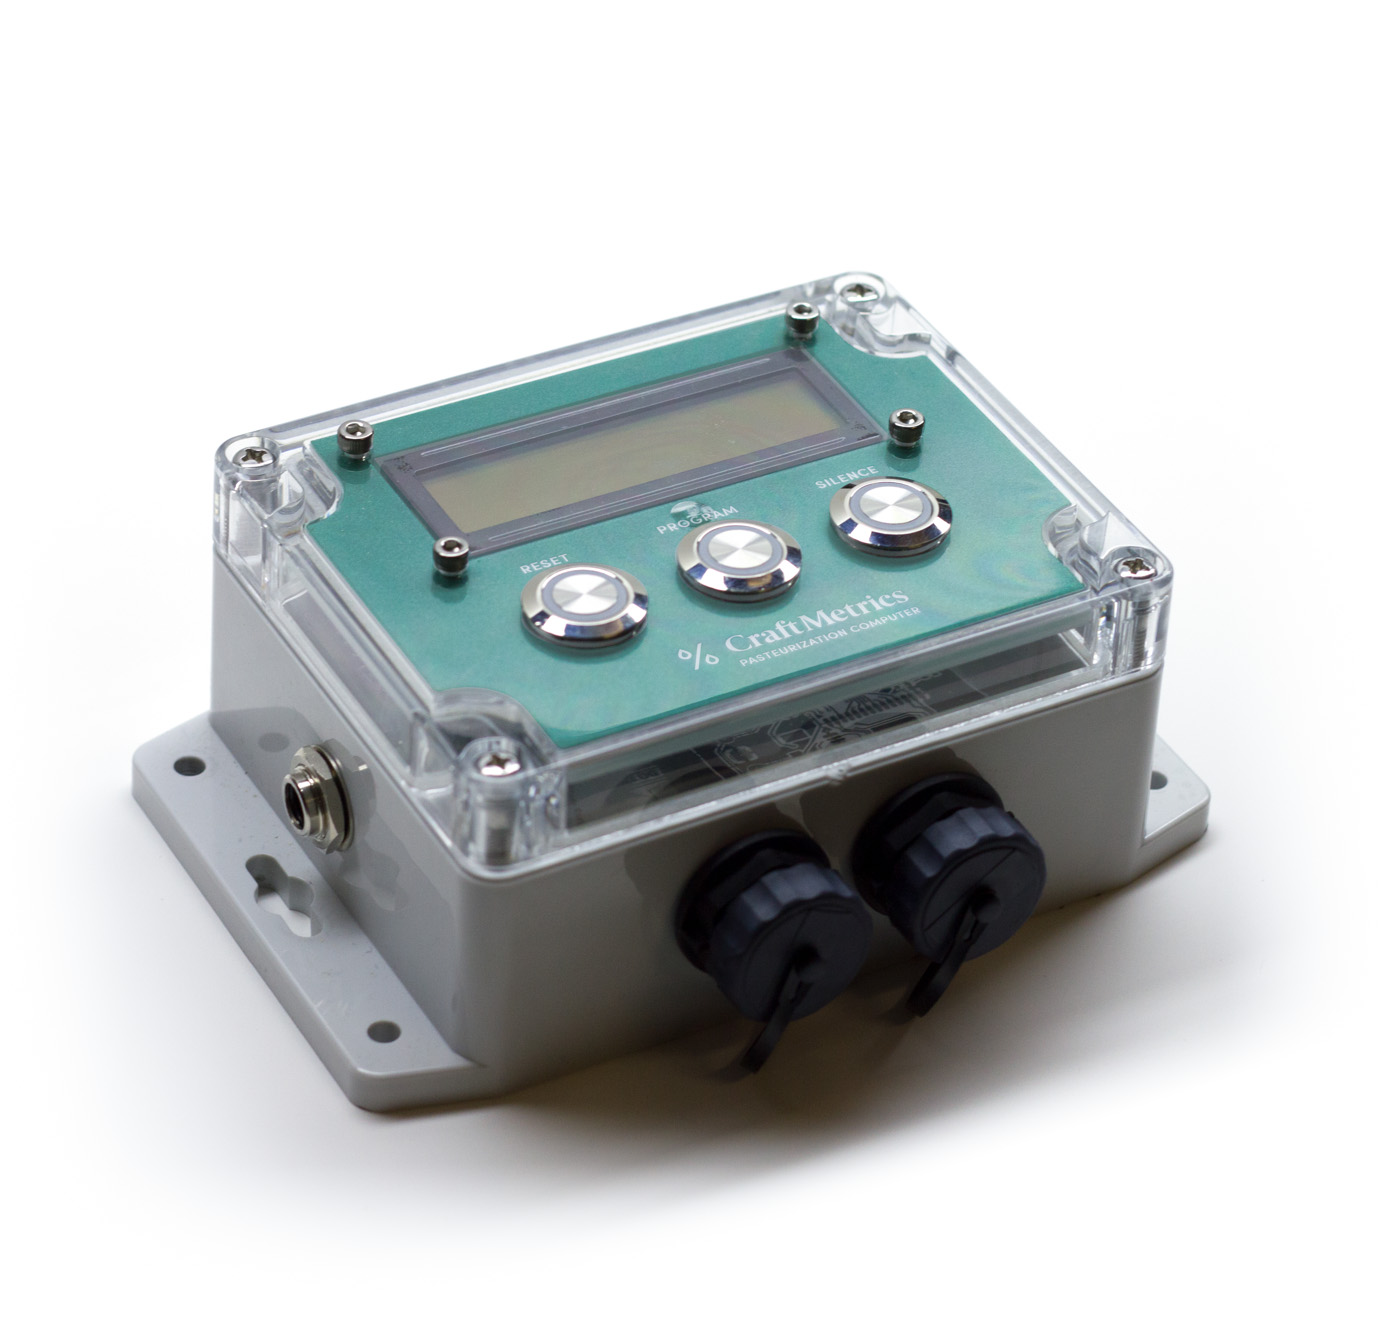
- Add your “pilot bottle” in too. The pilot bottle should contain water at a similar temperature to the product. If you have a Craft Metrics Pasteurization Computer, the probe with the rubber bung stopper goes into this bottle. You can also use a manual thermometer and estimate the the time required.
- Close the pasteurizer lid to keep the heat inside and the temperature as uniform as possible.
- When the Pasteurization Computer beeps to indicate the batch is done, remove the bottles and let them cool before handling.
- Repeat
Including cooling period in the PU calculation
Just like a roast continues to cook after you take it out of the oven, the bottles continue to pasteurize after they’re taken out of the bath. And they will continue to pasteurize until their internal temperature falls below 60°C. To fully calculate the PUs, leave the temperature probe in the pilot bottle until the batch has cooled below this point.
This means the value you choose as a PU set point is the point at which the bottles will be removed from the bath, which will be somewhat lower than the total PUs achieved including the cool-down period. Most users measure a batch to the end of its cool-down period only periodically or when ambient conditions change, and make adjustments to the PU set point accordingly.

Probe placement in bottles
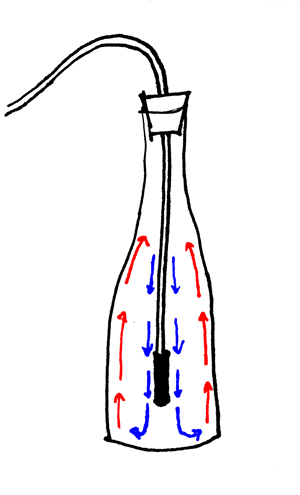
Glass bottles have relatively high thermal resistance, so the temperature inside the bottle is always lower than the temperature outside. For best accuracy, the probe should be placed in the middle of the bottle as close to the bottom without touching as possible as the cold convection currents will go down in the middle as seen in Figure 1.
Pasteurizing cans
Including a “pilot can” is a little more difficult due to the irregular opening. Some of our customers have drilled a hole in the bottom of the can that can accept the same rubber bung stopper used for bottles. Others have used an extra large rubber bung stopper that fits onto an unseamed can.
However in our testing, we’ve found that probe placement is far less critical for cans. Aluminum conducts heat almost 200 times better than glass, and a can’s wall is very thin. We’ve found that the internal temperature of a can tracks the external temperature very closely, and that simply placing the probe in between cans of product provides sufficient accuracy if the bath water is well-circulated.
Setting up your pasteurizer
In Part 3, we’ll discuss several options for pasteurizers, from DIY builds to commercial solutions.
Support for this project
Funding for this project has been provided by the Governments of Canada and British Columbia through the Canadian Agricultural Partnership, a federal-provincial- territorial initiative. The program is delivered by the Investment Agriculture Foundation of BC.
Opinions expressed in this document are those of the author and not necessarily those of the Governments of Canada and British Columbia or the Investment Agriculture Foundation of BC. The Governments of Canada and British Columbia, and the Investment Agriculture Foundation of BC, and their directors, agents, employees, or contractors will not be liable for any claims, damages, or losses of any kind whatsoever arising out of the use of, or reliance upon, this information.


