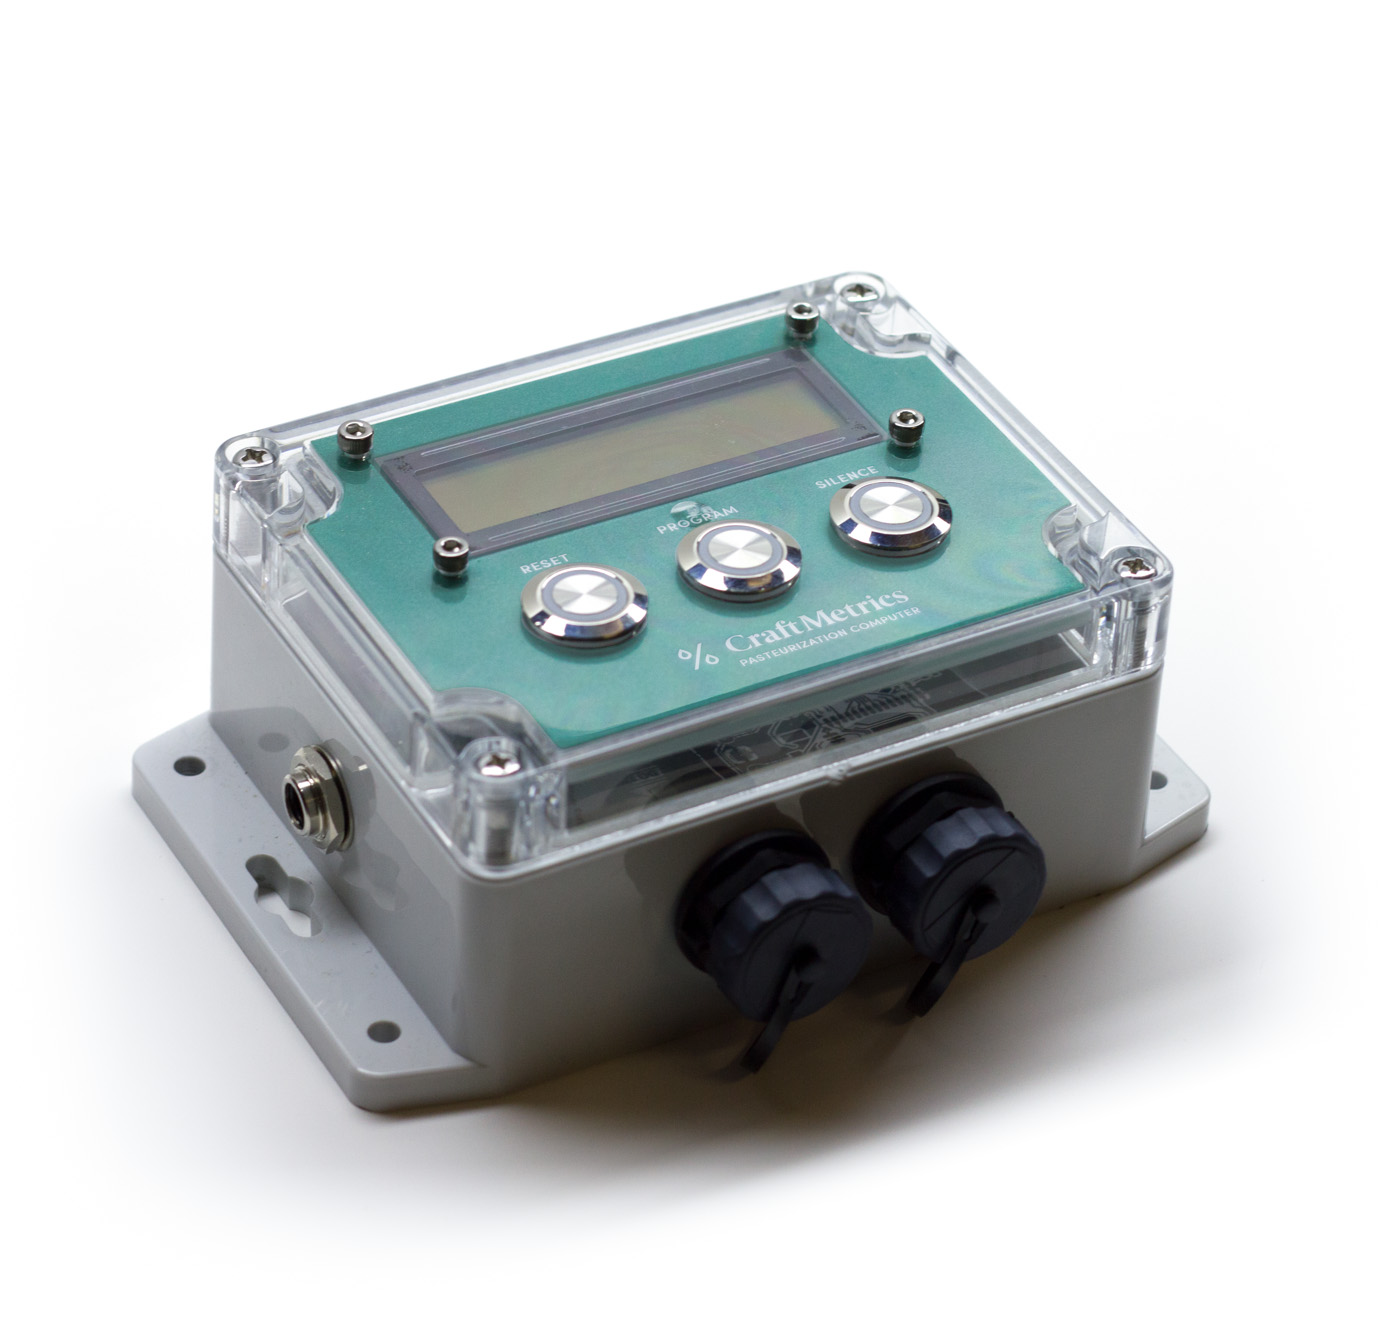
We often get asked to recommend a pasteurizer to go with the Craft Metrics Pasteurization Computer. Our device measures pasteurization and streamlines the workflow, but it requires a big container of heated water to actually do the work.
In this post, we’ll give an overview of what’s involved in building DIY water bath, including some equipment that we’ve seen used in many cideries. We’ve included links and photos, but just a note that these may not be perfect for your own project. They’re included to serve as examples. Like any DIY project, do your research and plan a design that works for you.
If you’d rather buy one ready-made, you can skip to the bottom of this post and find some links to recommended products.
This is part 3 in our 3-part series about pasteurizing craft beverages such as hard apple cider, beer, and wine. Check out Part 1 (The Science of Pasteurizing) and Part 2 (The Practice of Pasteurizing).
Choosing a container
When choosing a water bath container, there are several important factors to consider. The dimensions should fit your type of bottles or cans in the crates you intend to use, such as milk crates or similar. It should be ergonomic to lift the bottles in and out. Finally, it must be made of a material that can withstand high temperatures, can insulate against thermal loss, and is easy to drill and work with.
Many cideries use a Macro Plastics ProBin 16-S or 24-S with the optional Macro Lid. The 16-S has a footprint that can accomodate 9 standard milk crates, and enough depth for most configurations. The 24-S has the same footprint but is deeper. Both bins are made of polypropylene so they are very durable and can sustain pasteurization temperatures.
Another option is the Saeplast DX318, a container that is specifically designed to transport seafood on ice, so it is very well insulated. The plastic coating is medium-density polyethylene so it is a little less durable than the Macro ProBins. However, it has an excellent range of convenient accessories, and the extra insulation is a nice feature.
Both of these containers are meant to be lifted by a forklift or pallet jack, so they are as easy to move around as any other pallet.
Choosing a water heater
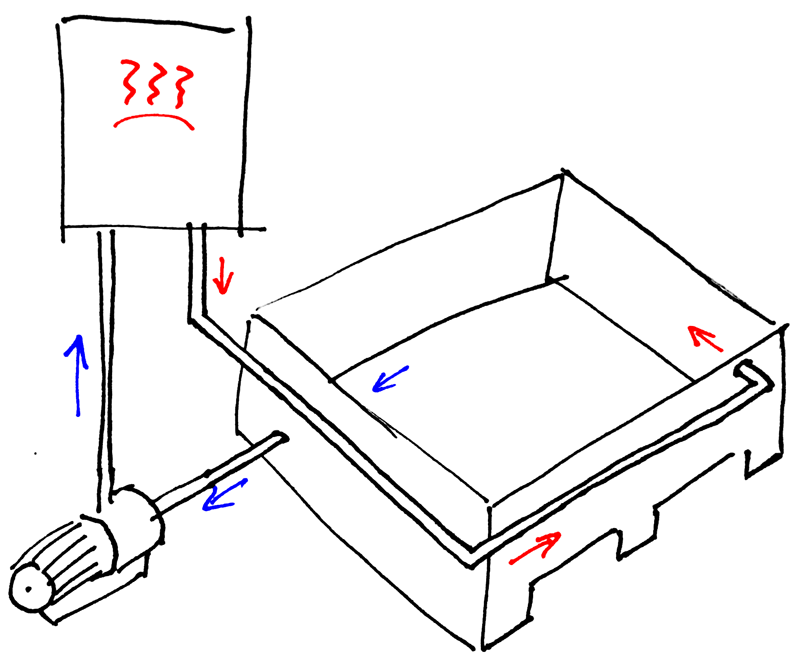
There are two common ways to heat the water. In one configuration, electric heating elements heat the water from below a false bottom. This makes for a nice self-contained pasteurizer, but it is more complex to build, so we’ll focus on the other method: an inline on-demand hot water heater.
The Rennai R94i is one popular option that can use propane or natural gas. In their standard configuration they only go as high as 60°C (140°F), so you will also need the Commercial Digital Temperature Controller which allows them to be set as high as 85°C (185°F).
Choosing a recirculation pump
A pump is required to move water from the bath container to the water heater so that it can be heated and then flow back to the bath. Most pumps will work for this purpose, as long as they are rated to handle at least 85°C at continuous duty (running for long periods).
Two options include:
- http://www.tellarini.com/inglese/prodotti2a_ing.htm
- https://us.grundfos.com/products/find-product/jp.html
- Check your local homebrew shop too. Low-cost pumps for homebrewing can work well too.
Fittings, piping, and miscellaneous
CPVC and PEX are both rated for high temperatures, but we recommend PEX because it is so easy to work with.
Where the pipe meets the water bath container, you’ll need some type of bulkhead to make a clean connection. Homebrew shops often sell ½” NPT bulkheads. Drill an appropriately-sized hole in the plastic wall, and the bulkhead flanges seal against it, providing a threaded fitting on which you can attach a pipe.
Assembling Your Bath Pasteurizer
Now that you have everything you need, here’s how to put together a DIY bath. Read through all of these instructions and lay out the parts before you start cutting or drilling. You can’t undrill a hole!

- Make a hole for the water drain bulkhead in the container, as close to the bottom as possible. You can drill through the bottom floor of the container, or as low as possible on a sidewall. If you go through the bottom, make sure to route the pipe in such a way that it doesn’t obstruct a pallet jack from picking up and moving the container.
- Make a second hole for the water inlet that is higher up on one of the sidewalls. Choose a location that’s far away from the outlet to ensure that water will be forced to circulate and heat evenly.
- Insert both of the bulkheads and tighten them down.
- Connect the drain bulkhead to the pump inlet. Try to position the pump low to the ground so that it self-primes easily.
- Connect the other side of the pump to the cold water input of the water heater.
- Connect the water heater’s hot water output to the container’s inlet bulkhead.
Tips
- It’s best to keep crud out of your pump and heater, so make sure to install some sort of filter on the drain. This could be a screen from your local homebrew shop, or an inline filter from the plumbing section of your hardware store.
- To protect the temperature probes of your Craft Metrics Pasteurization Computer, consider drilling some small holes or notches near the top of the bin to feed them in. This will prevent them being pinched by the container lid. For the water probe, consider installing a dedicated thermowell.
Further Reading
- Pasteurizing on a Small Scale by Reverend Nat
- DIY bath pasteurizer w/ tankless water heater on the Cider Workshop
Buy a Ready-Made Bath Pasteurizer
If you would rather just buy a ready-made bath pasteurizer, here are a couple of options:
Support for this project
Funding for this project has been provided by the Governments of Canada and British Columbia through the Canadian Agricultural Partnership, a federal-provincial- territorial initiative. The program is delivered by the Investment Agriculture Foundation of BC.
Opinions expressed in this document are those of the author and not necessarily those of the Governments of Canada and British Columbia or the Investment Agriculture Foundation of BC. The Governments of Canada and British Columbia, and the Investment Agriculture Foundation of BC, and their directors, agents, employees, or contractors will not be liable for any claims, damages, or losses of any kind whatsoever arising out of the use of, or reliance upon, this information.


